Homeless in Vancouver: My amazing Duro Fantasy tires finally wear out!
I first put the 20-inch Duro Fantasy BMX tires on my bike trailer 18 months ago in July of 2013.
Prior to the Duros, no tire had lasted longer than four months on my bike trailer—two months wasn’t uncommon.
The Duros lasted an entire year and a half with no problems and only suffered two tube punctures! I would’ve said such performance was impossible except that I saw the Duros do it.
On Sunday evening, I finally had to replace those amazingly long-lived tires with a cheap pair of red Kenda nylon tires.
I didn’t want to do that; I wanted those Duros to last forever. Barring that, as I watched them finally begin to show signs of tread wear last summer, I only wanted to replace them with another pair of Duro Fantasy tires but I didn’t find a new pair in time.
I should’ve actually replaced them two month ago—I could clearly see a bald spot developing on one of them but still I waited.
Technically, time ran out a few weeks ago when the thinnest part of the bald spot on the one tire thinned out to nothing and left a tiny little peep hole in the tire.
I say “technically” because I immediately stabilized the damaged section of tire with hard plastic underneath the hole and a protective section of tire over top.
Perhaps I could’ve gotten many weeks more use out of the wonderful, if somewhat superannuated tires, but perhaps not.
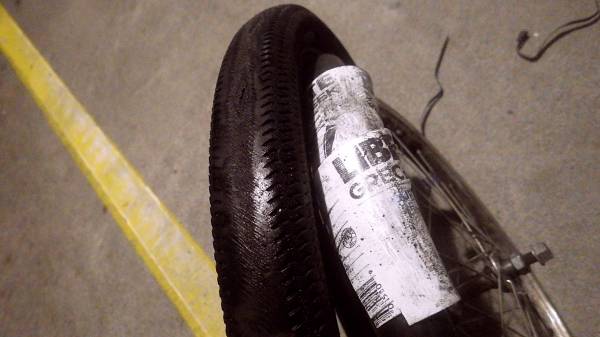
“Booting” a tire to put off giving it the boot

In the last two months of its life, one of the Duro Fantasy tires revealed sustained wear in one spot—an indicator of a flaw in the rotation of the wheel. This wear finally produced a tiny hole in the tire.
A bicycle tire that sustains a rip, tear, slash or, hole that allows you to see the surface of the inner tube must be replaced.
If that isn’t immediately possible, then the damaged area of the tire must at least be immediately braced from the underside with a so-called “boot” in order to protect the exposed inner tube.
Most times an accident that necessitates an emergency tire boot also flattens the inner tube.
You can insert the boot in between the inner tube and the breach in the tire after you reseat the partially inflated tube on the rim and as you tuck it into the tire.
The boot can be a stiff piece of paper or card, thick rubber, or firm plastic; it needs to be larger than the breach in the tire and its function is to insure that the fully inflated tube cannot push out through the opening in the tire.
In my case, I used pieces of firm, flexible plastic cut out of a clean yogurt container.

Because I wasn’t planning to replace the tire immediately, I went a step further and cut a six-inch section out of a junked 26-inch slick tire. I then fitted that section over top of the damaged section of tire
The beads of a bicycle tire—the two edges of the tire that sit inside the wheel rim—are internally reinforced with steel wire.
In my section of slick tire I made four, equally spaced one-centimetre cuts just above the steel wire on both beads; this allowed me to firmly fix the section of slick tire in place using nylon cable ties, aka zap straps.

If an outer boot was fixed on with normal single-use cable ties, it could be impractical as anything but a very temporary emergency measure as you would have to cut the nylon ties to fix a flat and use new ties to replace the outer boot.
I did it this way for about two weeks because I have five sturdy, releasable nylon cable ties; otherwise I could’ve used string.
Waste not, want not

I decided the Duro Fantasy tires were garbage but not before I tried cutting out the top-most strip of tread. I was using pretty weak scissors and I gave up after cutting out only about six inches in 15 minutes.
The remaining 20-some inches of slick tire were easier to work with: the top-most tread was thick but the sidewalls were thin and easy to cut away. In a minute or so I had a 20-inch long, two-inch-wide strip of tough rubber that was perfectly suited to serve as an anti-puncture tire liner.
Something I would be wise to consider now that I back to using thoroughly average tires.
 Stanley Q. Woodvine
 I might pop my DIY tire liner into one of my tires or I might wait until I find a similar slick tire so I can line both my tires at the same time.
And seeing as how I’m on the subject of inexpensive puncture protection, I should mention what might be the ultimate in that sort of do-it-yourself tire liner, namely a wide steel tape measure.
Some people suggest that you use steel wire to stitch the steel measuring tape on top of a strip of tread cut out of a slick tire but I think that’s unnecessary overkill—plus the steel wire would be exposed to too much moisture and I’d worry about it breaking into pieces that could pierce and flatten the inner tube.
When I next find a trashed tape measure of the suitable width, I’m going to try using contact cement to glue the steel measuring tape to a strip of bicycle inner tube cut just a bit wider than the tape. I can’t see why that wouldn’t work to provide a very high degree of puncture protection. If more protection was wanted, I would consider gluing together a double layer of steel tape before I ever went through the rigamarole of sewing the tape onto a strip of tire tread.
The false economy of cheap tires
In the meantime I have my new red nylon Kenda tires which I don’t expect to last more than a few months.
Bike stores are full of cheap tires which always turn out to be more expensive than premium tires in the long run; that’s because the cheap tires wear out so much faster.
The Kendas cost me $30 and change (with the bike store throwing in a 20-inch tube). That’s two-thirds what the discounted Duros cost me but I don’t, for a minute, expect the Kenda tires to last two-thirds as long (six months) as the Duros (18 months).
As far as I’m concerned, had I paid the full $60 or $70 price tag for the Duros, they would’ve still been an exceptional bargain.
I think the longevity of the Duros really shows how you shouldn’t buy bicycle tires (just like you shouldn’t buy bike locks) on the basis of price, but purely on the basis of material quality and proven performance.
I just hope I find another pair of Duros before the Kendas wear out.


Comments
1 Comments
Cranky Mom
Feb 3, 2015 at 1:10pm
Nice MacGivering! My grandfather used to take old bike parts and put them together into fully functioning bicycles for kids on the street. No part went to waste. He made me a unicycle and a small sized penny-farthing.